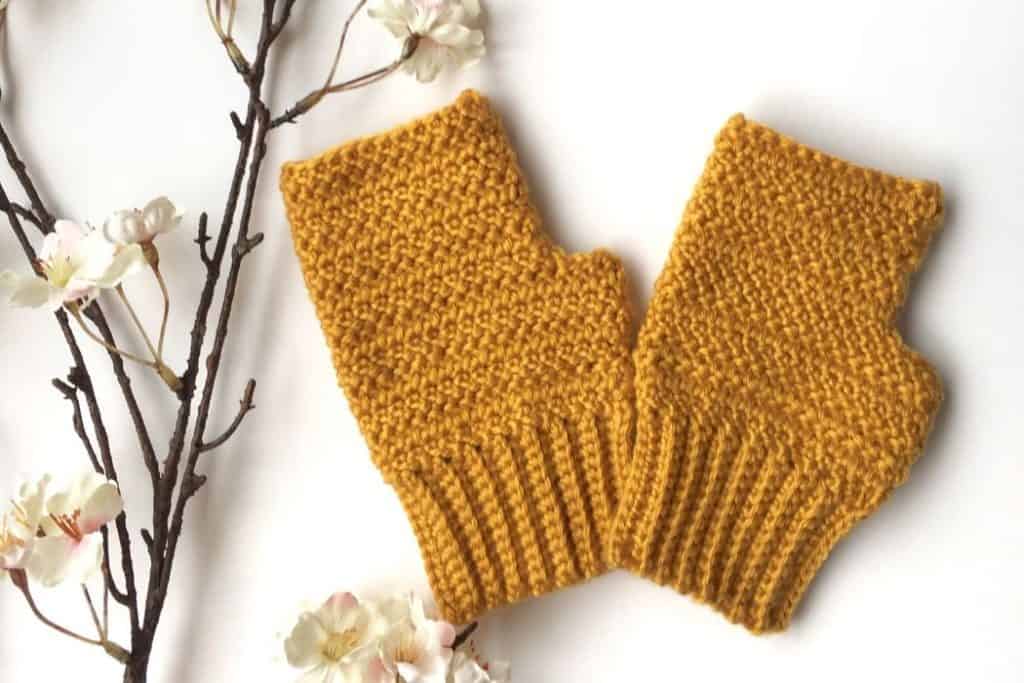
A free crochet mittens pattern using the herringbone stitch! This is one of my favourites, and now one of my favourite stitches too. I’d not used the herringbone stitch before I put this together and I was really surprised with how quickly it works up. Most people could finish a pair of these in an evening!
You can find a coordinating headband / headwrap in the same stitch here, and more mittens here.
You can find the ad free PDF version on Etsy and Ravelry below.

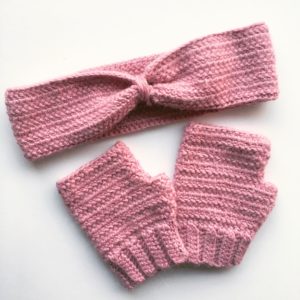
It’s a really versatile herringbone crochet mittens pattern that looks gorgeous with lots of different yarn styles, and for men and women too! The set pictured in pink do follow a slightly different pattern as when I was first trying these I went for a DC rib instead of SC, so if you prefer the look of these then by all means swap out the SCs in the back loops for a DC but be mindful that you’ll need to adjust the rows to accommodate the bigger stitch of a DC.
This post may contain affiliate links. Find full disclosure here.

More Free Crochet Patterns
Free Herringbone Crochet Mittens Pattern
Materials
- <100g of an aran weight yarn (mustard pictured is Paintbox Simply Aran in mustard yellow)
- 4.5mm hook
- Scissors and needle for finishing

Concentration level – Simple stitches and beginner friendly, just remember to turn back when you get to the end of a row!
Stitches used (US terms)
- Single Crochet in back loop only (pull one loop through the half of the stitch furthest from you, yarn over and pull through two loops)
- Herringbone Double Crochet (yarn over and pull up a loop (3 on hook), pull the first loop through the second (2 on hook), yarn over and pull through first loop (2 on hook), yarn over and pull through both loops to finish)
Cuff
1. CH13, SC in 2nd CH from hook. Continue working SC until the end of the chain (12)
2. CH2, SCBL in each SC until the end (12)
Repeat step 2 for a further 31 rows, totalling 33 rows of a ribbed SC. Join back to the starting chain by slip stitching into each of your beginning stitches to close the edge that will sit around the wrist.
We will continue working from here to start the next stage.
Hand
1. CH2 (this will never count as a stitch) and work 1HB into each of your rows from the previous stage, ending up with an evenly spaced 33 stitches. SS to join (33)
2. CH2 and instead of continuing around, turn your work to stitch back the way we came. Work 1HB in each stitch around, the stitches will be worked from the inside out of the mitten to give us the alternating striped effect. SS to join (33)
Repeat step 2 for a further 4 rows, totalling 6 rows of alternating herringbone stitches.
3. At the end of row 6, do not CH2. Instead, SS across for 4 stitches. CH2 and work 1HB in each stitch for a count of 25. SS after the 25th HB across to the 1st HB. The stitches we have skipped will make thumb space (25)
4. CH2, turn your work and repeat 1HB in each in the opposite direction (25)
Repeat step 4 for a further 5 rows.
SS to close and weave in ends. Repeat all steps for the 2nd hand.
Ta dah!


