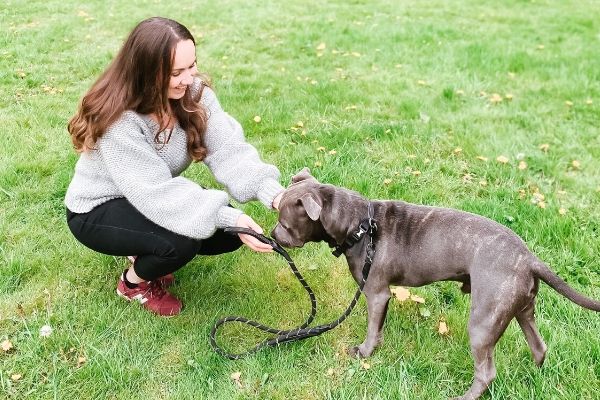
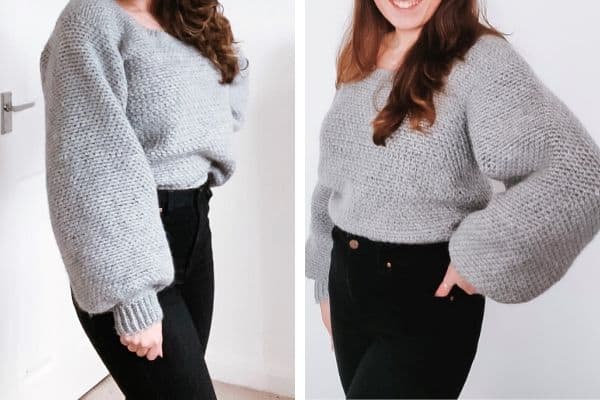
If you’re looking for a classic, simple crochet sweater pattern to take you from autumn through to spring you’re in the right place! The Marley sweater has become one of my all time favourite patterns and I can’t take it off. The oversized sleeves are the comfiest, cosiest things and are my favourite part.

It’s made up of the moss stitch, a simple and relaxing stitch that works up really quickly. It also comes with 3 length options (crop, mid and full) and sizes XS-3XL.
It’s cosy enough for the winter, but the loose fit will let you wear it into spring too. Especially in a crop length!


Getting the right gauge is important, but there are little increase and decrease stitches making this a relatively beginner friendly garment pattern.
This post will talk you through size M, for you to make adjustments from there for your size if you wish. You can find the ad-free PDF version inclusive of sizes XS-3XL on Etsy and Ravelry below.

This post contains affiliate links. Find full disclosure here.
More Free Crochet Patterns
Marley Crochet Sweater Pattern

You Will Need:
500-1200g or 950-2250m of aran weight yarn
Recommend:
James C Brett Aztec (pictured in shade 03). The drape is beautiful and it’s got a lovely fuzzy texture that feels so luxe!
Lion Brand Feels Like Butta
5.0mm and 6.0mm hooks, or size required to meet gauge.
Stitches & Abbreviations – US Terms
Moss / linen stitch
oRow A – (sc, ch1) repeat
o Row B – (sc in each ch1 sp, ch1) repeat
Increase
o In each ch1 sp, work (sc, ch1, sc, ch1) •
Decrease
o Pull up a loop in the next stitch – 2 on hook
o Pull up a loop in the 2nd stitch – 3 on hook
o Yarn over pull through two – 2 on hook
o Yarn over pull through two – finish
US/UK Single Crochet (sc)/Double Crochet (dc)
Back Loop Only (BLO)
Decrease (dec) / Increase (inc)
Slip Stitch (sl st)
Chain / space (ch / ch sp)
Stitches (sts)
Notes
- Stitch count will be in brackets at the end of each row.
- Pattern is worked from the bottom up, with a front and back panel joined together. Sleeves then follow separately in rounds and added on afterwards.
- Starting ch does not count as a stitch.
- Moss stitch will always start with sc unless specified otherwise, and will sometimes mean working the first stitch into a sc in the previous row rather than ch1 sp. In this case, sc in the sc from prev row, then sc again into ch1 sp and continue as normal.
Gauge
Moss stitch body: 19 sts and 18 rows in 4×4” • Ribbed sc: 12 rows in approx. 2.5×2.5
Marley Crochet Sweater Pattern (M)
Back Panel
Bottom ribbing:
Row 1: With 5.5mm hook, ch11, sc in 2nd ch from hook and to the end (10)
Row 2: ch1, turn, sc in BLO and to end (10)
Repeat Row 2 for a total ( 85 ) rows.
Back panel body:
Row 1: With 6.5mm hook and now working horizontally, ch1, sc in the top of each row from the previous step (85)
Row 2: ch1, turn, complete a row of moss stitch, starting and finishing on sc (85)
For a cropped fit: Repeat Row 2 for a further (33) rows.
For a mid fit (pictured): Repeat Row 2 for a further (43) rows.
For a full length fit: Repeat Row 2 for a further (53) rows.
We will now indent on both sides to allow more space for the sleeves.
Decreased rows For all sizes, ss across 7 sts. Ch1, sc, work moss stitch until your stitch count is (71), leaving 7 unused stitches. Ch1, turn, complete a row of moss stitch starting and finishing on sc (71).
Repeat the previous row for a further (36) rows.
The back panel should total (81) rows (+ or – 10 for cropped or full length), excluding ribbing. Close off yarn.
Front panel
Repeat the same steps as the back, up to but not including the decreased rows. Match the number of rows to your rows for the back panel (crop/mid/full length).
For all sizes, ss across 7 sts. Ch1, sc, work moss stitch until your stitch count is (71, leaving 7 unused stitches.
Row *: Ch1, turn, complete a row of moss stitch starting and finishing on sc (71).
Repeat Row * for a further (9) rows.
The neckline will be shaped one side at a time, with the instructions for each size below starting again from Row 1.
Row 1: ch1, turn, work moss stitch for 22 sts, dec (23)
Row 2: ch1, turn, moss stitch stitch for 23 sts (23)
Row 3: ch1, turn, moss stitch for 21, dec (22)
Row 4: ch1, turn, moss stitch for 22 (22)
Continue alternating decrease and maintenance rows until your stitch count is (17). In any row you finish on a ch1, work sc2tog instead. Continue with moss stitch for a further (14) rows.
Join yarn to the opposite and repeat steps from Row 1 above. Close off yarn.
I recommend pinning front and back together and trying on at this stage to check the neckline. Sew front and back together when you’re happy, joining the sides and tops of the shoulders.
Sleeves (x2)
Cuff ribbing :
Row 1: With 6.5mm hook, ch11, sc in 2nd ch from hook and to the end (10)
Row 2: ch1, turn, sc in BLO to end (10)
Repeat Row 2 for a further (32) rows. Join the first and last row with ss to form a loop, turn the right way round and ch1.
Sleeve body:
On the sleeves the moss stitch will be even, alternating between starting with the sc and starting with the ch1 (effectively a ch2) and turning on every row
Row 1: With 6.5mm hook and now working horizontally, sc in the top of each row from the previous step (32)
Row 2: ch1, turn, complete a row of moss stitch, ss into first st (32)
Rows 3 to 4: Repeat Row 2
Row 5: ch1, turn, inc in every ch1 space around, ss. (68)
Rows 6 to 8: ch1, turn, moss stitch around, ss. (68)
Row 9: ch1, turn, moss stitch around, working 22 inc stitches evenly throughout. For example, to increase Row 8 (with 60 sts) by 18 sts, increase approx. every 3 sts. (90)
Row 10: ch1, turn, moss stitch around (90)
Repeat Row 10 until sleeve totals (90) rows.
Repeat for second sleeve.
Sew both sleeves onto the body of the jumper.
Neckline :
Row 1: with 5.5mm hook, ch5, sc in 2nd ch from hook and to the end (4)
Row 2: ch1, turn, sc in BLO across (4)
Repeat Row 2 until it’s a length that you can comfortably sew around the neckline to add a ribbed edge, approx. 150 rows. Pin in place and sew to join.
Weave in ends and finished!
I hope you love this crochet sweater pattern – you can get the remaining sizes below, or add to Pinterest for later.


