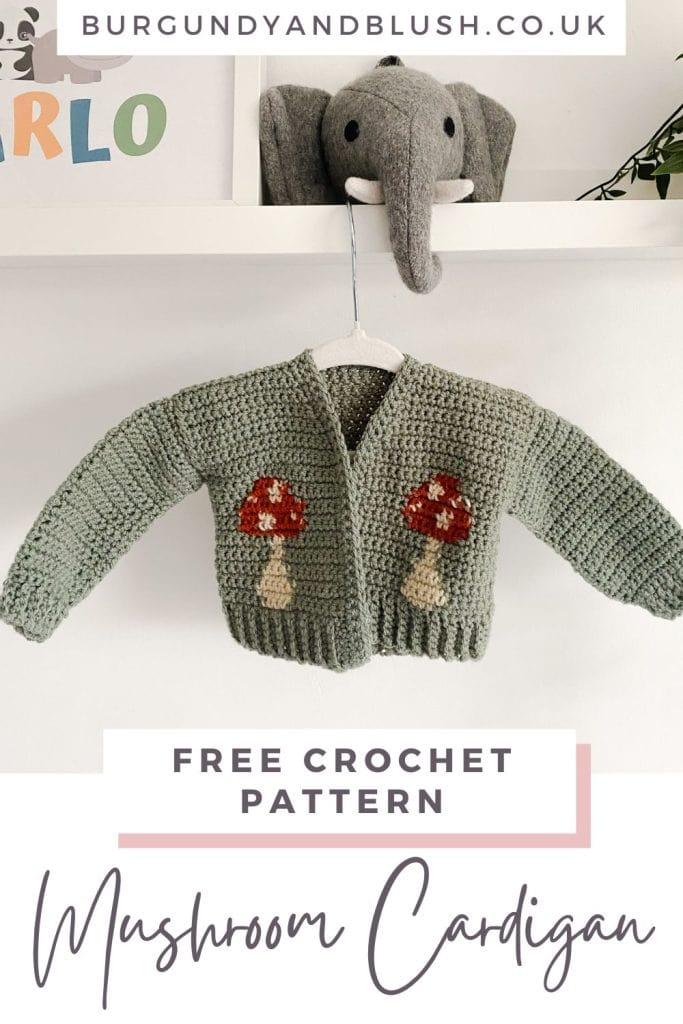
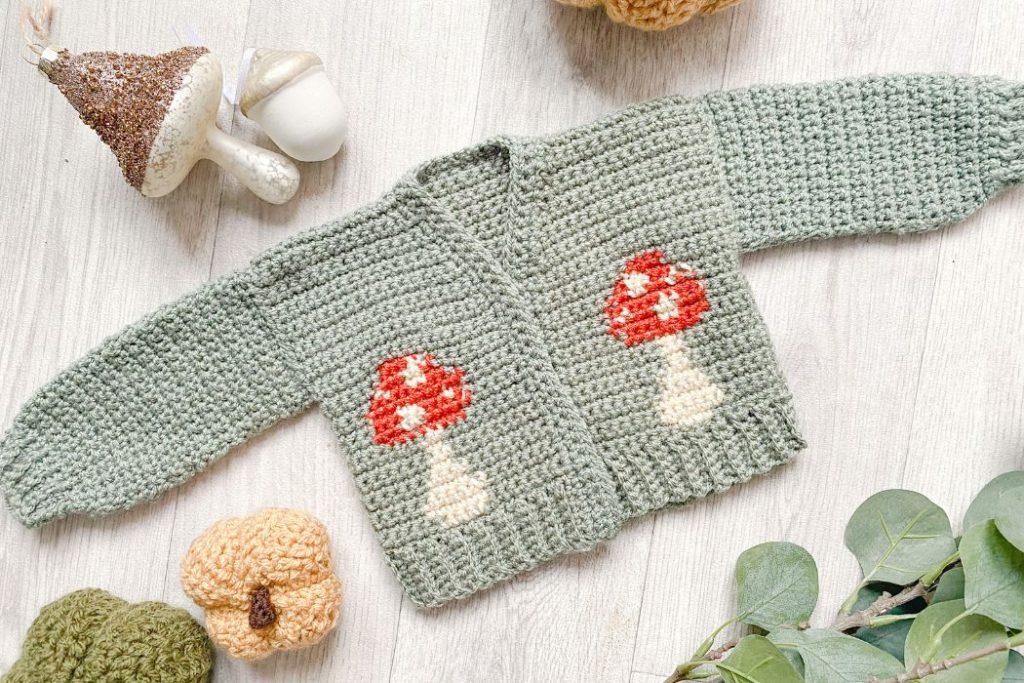
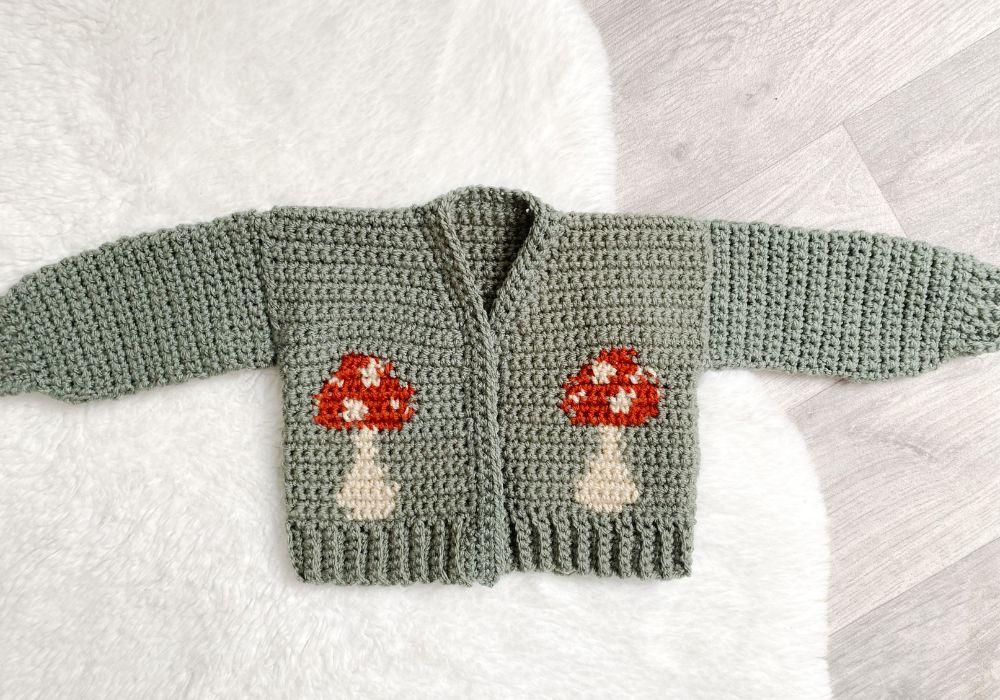
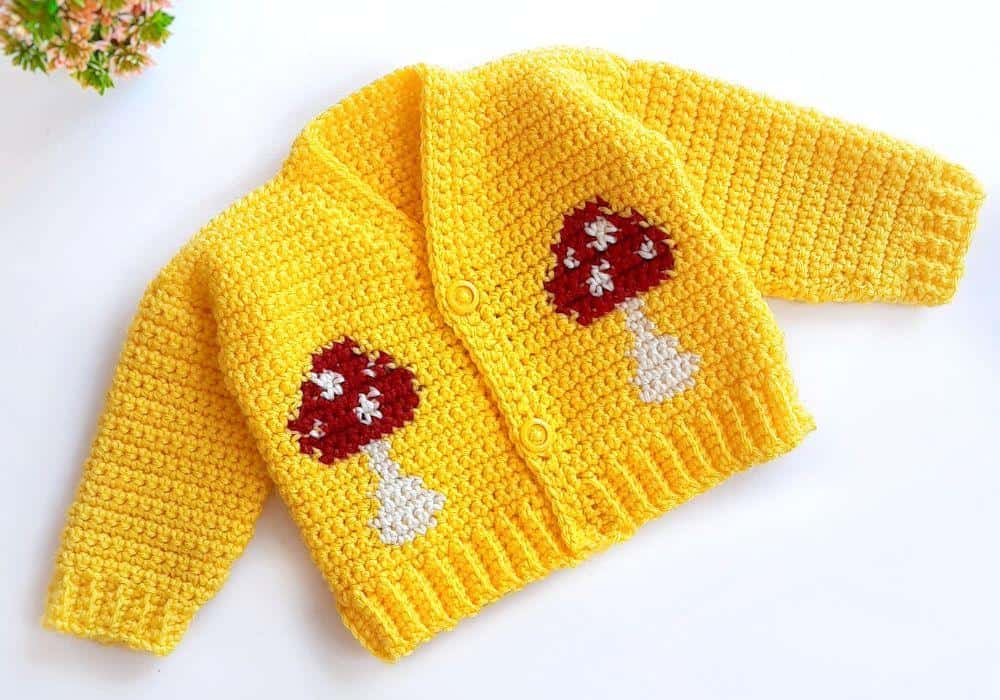
Introducing the cutest mushroom crochet cardigan pattern – a cozy and adorable creation for your little one! In autumnal colours with tiny tapestry mushroom / toadstools, it’s written with simplicity and cuteness in mind.
In baby sizes 0-24 months, the construction is simple and only one stitch is used throughout. Charts are included for the stitch placement on the mushy sections, colour coded by size for easy reference. Made with DK acrylic, it’s accessible across tons of brands and colours.
This post contains affiliate links, meaning I may make a commission if you purchase through a link, at no additional cost to you.
More Baby Crochet Patterns
Get the ad-free PDF in sizes from 0-3 months up to 18-24 months in your favourite pattern store below!
Mushroom Crochet Cardigan
Materials
- DK acrylic
- 5.0mm/H hook
- Scissors and needle for finishing
Concentration Level
A simpler garment pattern for confident beginners and upwards. An added complexity with following a chart for the mushroom design.
Gauge
In 4×4″: in sc, 19 rows and 17 sts
Size Guide & Yardage
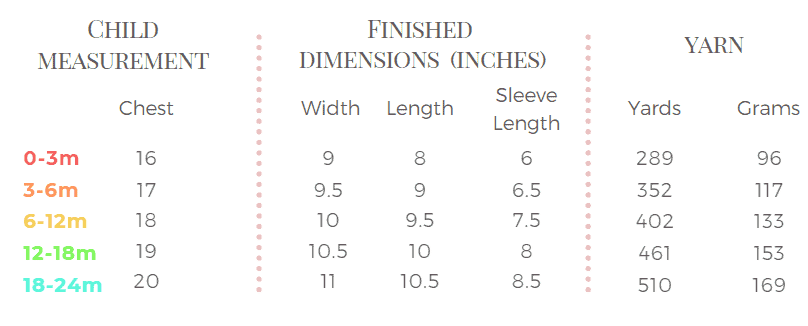
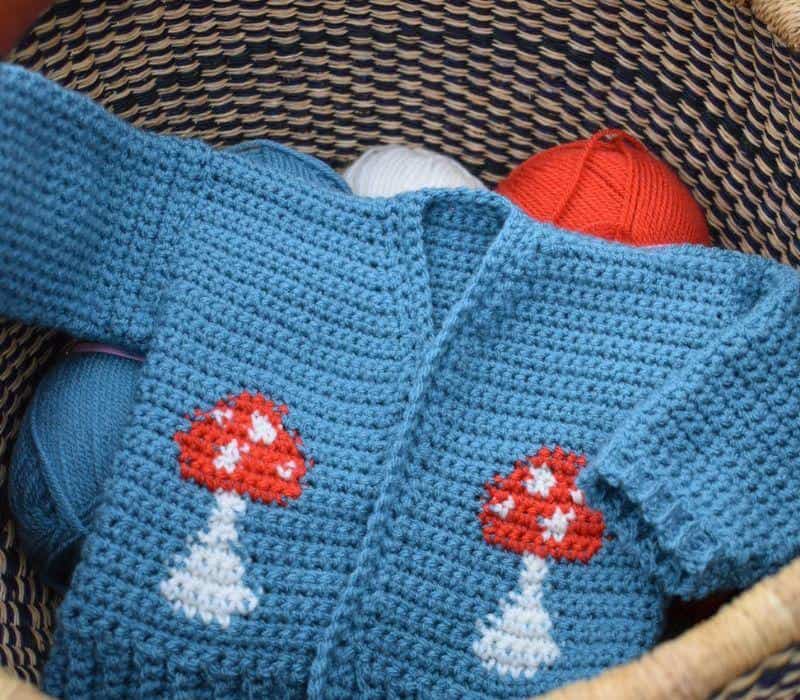
Mushroom Crochet Cardigan – Free Pattern
Written for sizes 0-3, 3-6 and 6-12 months.
Back Panel
Ribbing
Row 1: ch7, sc in 2nd ch from hook and to the end, turn (6)
Row 2: ch1, sc in blo to the end (6)
Repeat Row 2 until you have (38, 40, 42) total rows of sc blo.
Turn to work horizontally down the side of your ribbed section.
Body
Row 1: ch1, sc in the top of each row of ribbing, turn (38, 40, 42)
Row 2: ch1, sc in each st, turn (38, 40, 42)
Repeat row 2, following the colour chart below for the mushroom design, until you have a total of (33, 38, 40) rows. Finish yarn. The corresponding colour in the chart signifies the start and end of the row for each size.
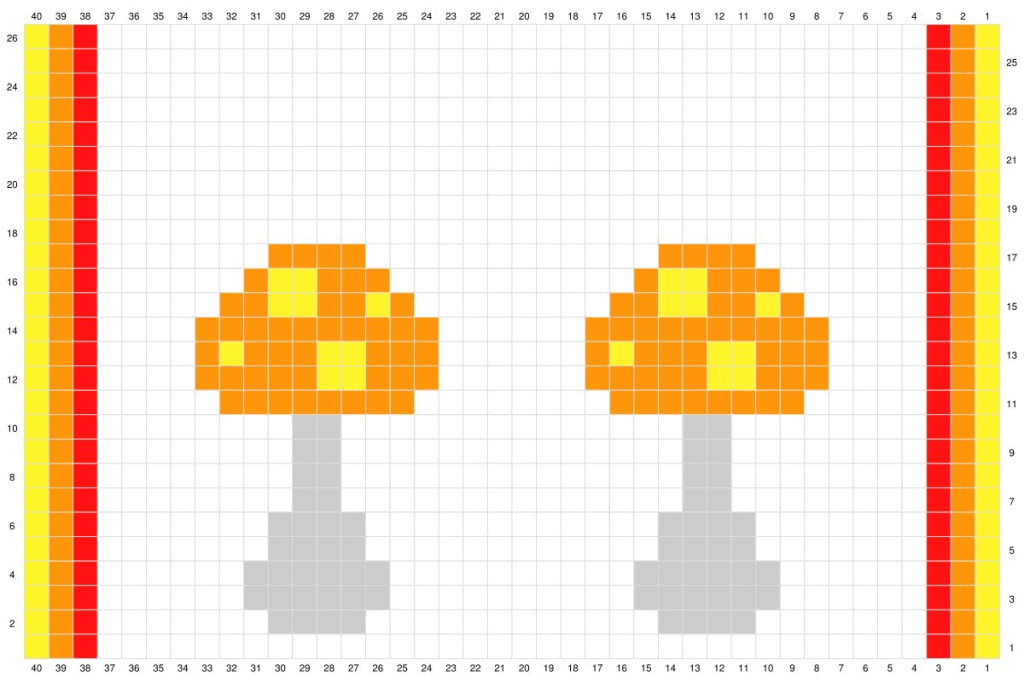
Front panel – left
Ribbing
Row 1: ch7, sc in 2nd ch from hook and to the end, turn (6)
Row 2: ch1, sc in blo to the end (6)
Repeat Row 2 until you have (19, 20, 21) total rows of sc blo.
Turn to work horizontally down the side of your ribbed section.
Body
Row 1: ch1, sc in the top of each row of ribbing, turn (19, 20, 21)
Row 2: ch1, sc in each st, turn (19, 20, 21)
Repeat row 2, following the colour chart below for the mushroom design, until you have a total of (20, 24, 26) rows. The corresponding colour in the chart signifies the start and end of the row for each size.
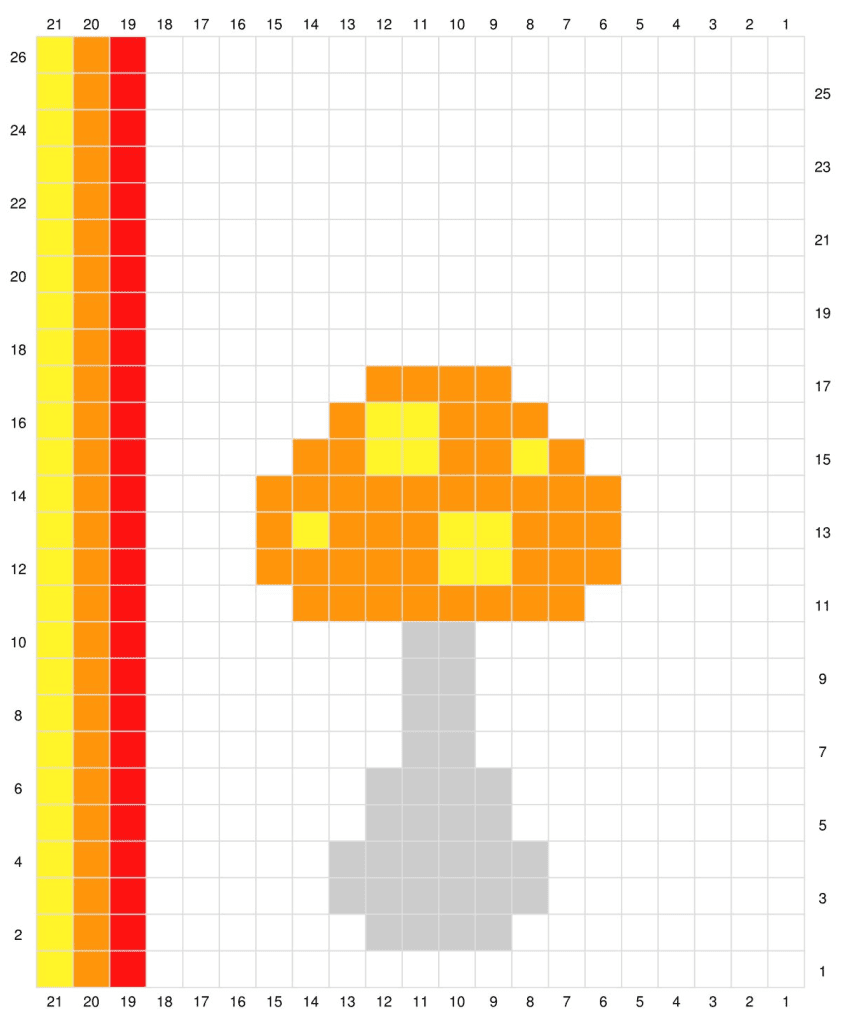
Neckline
Row count starts from 1 again.
Row 1: ch1, sc2tog, sc in each st to the end, turn (18, 19, 20)
Row 2: ch1, sc in each st, turn (18, 19, 20)
Repeat Rows 1 and 2 until you have (33, 38, 40) rows in total and a stitch count of (13, 14, 15). Finish yarn and move to the right side.
Front panel – right
Ribbing
Row 1: ch7, sc in 2nd ch from hook and to the end, turn (6)
Row 2: ch1, sc in blo to the end (6)
Repeat Row 2 until you have (19, 20, 21) total rows of sc blo.
Turn to work horizontally down the side of your ribbed section.
Body
Row 1: ch1, sc in the top of each row of ribbing, turn (19, 20, 21)
Row 2: ch1, sc in each st, turn (19, 20, 21)
Repeat row 2, following the colour chart below for the mushroom design, until you have a total of (20, 24, 26) rows. The corresponding colour in the chart on the next page signifies the start and end of the row for each size
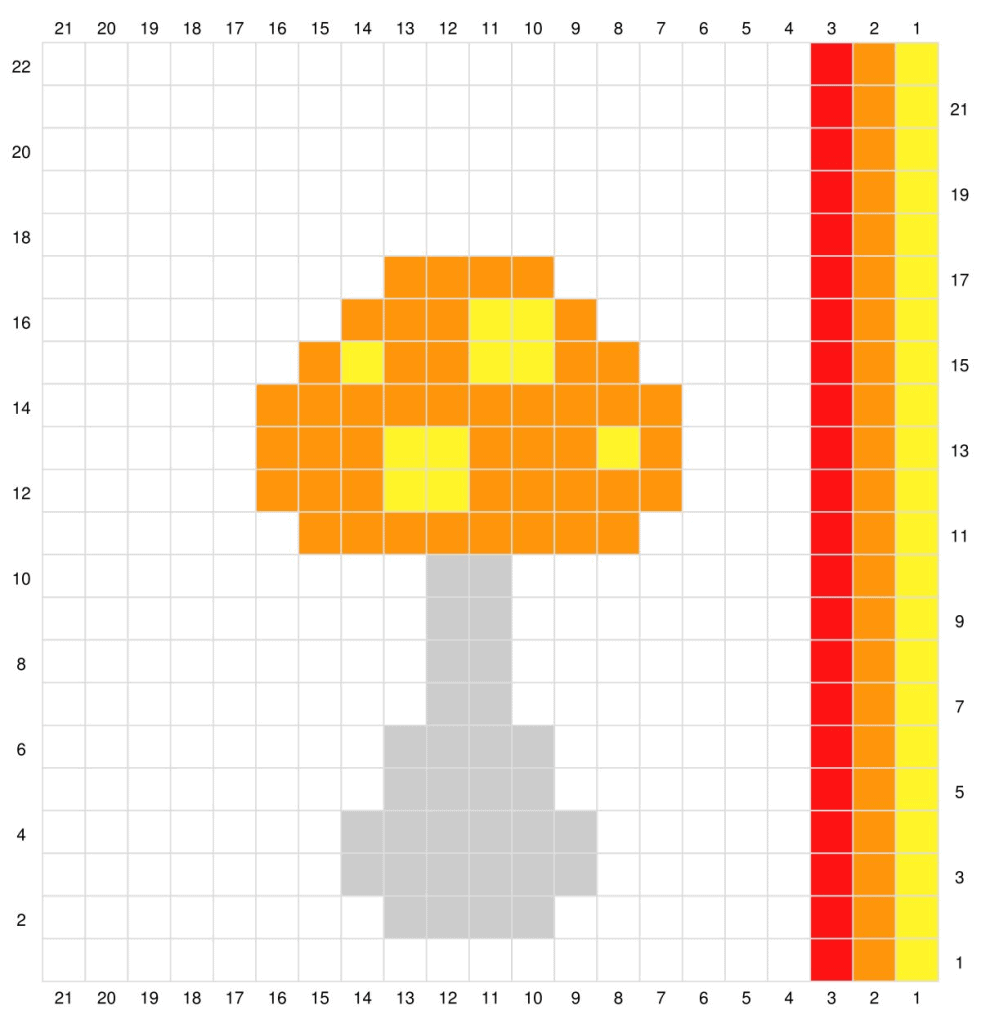
Neckline
Row count starts from 1 again and will be working on the ‘wrong side’. This will make the mushroom on this panel the same as on the other side, rather than a mirror image.
Row 1: ch1, sc2tog, sc in each st, turn (18, 19, 20)
Row 2: ch1, sc in each st, turn (18, 19, 20)
Repeat Rows 1 and 2 until you have (33, 38, 40) rows in total and a stitch count of (13, 14, 15). Finish yarn.
Move to sleeves.
Sleeves (make 2 identical)
Row 1: ch(27, 31, 33, 35, 37), sc in 2nd ch from hook and each st to the end, turn (26, 30, 32) you may want to size up a hook for the starting chs if you tend to have a tighter tension.
Row 2: ch1, sc in each st, turn (26, 30, 32)
Rows 3 to 19: Repeat Row 2 (26, 30, 32)
Row 20 (0-3): ch1, sc2tog, sc in each st to the end, turn (25)
Row 20 (all others): Repeat Row 2 (30, 32)
Row 21: Repeat Row 2 (25, 30, 32)
Row 22 (0-3, 3-6): ch1, sc in each st, dec over the last 2 sts, turn (24, 29)
Row 22 (6-12): Repeat Row 2 (32)
Row 23: Repeat Row 2 (24, 29, 32)
Row 24 (0-3, 3-6): ch1, sc2tog, sc in each st to the end, turn (23, 28) size 0-3 move to cuff
Row 24 (6-12): Repeat Row 2 (32)
Row 25 (3-6): Repeat Row 2 (28)
Row 25 (6-12): ch1, sc2tog, sc in each st to the end, turn (31)
Row 26 (3-6): ch1, sc in each st, sc2tog over the last 2 sts, turn (27) move to cuff
Row 26 (6-12): Repeat Row 2 (31)
Row 27: ch1, sc in each st, sc2tog over the last 2 sts, turn (30)
Row 28: Repeat Row 2 (30)
Row 29: ch1, sc2tog, sc in each st, turn (29)
Row 30: Repeat Row 2 (29)
Row 31: ch1. sc in each st, sc2tog over the last 2 sts, turn (28) size 6-12 move to cuff.
Cuff
Row 1: ch5, sc in 2nd ch from hook and next 3 sts (4), sl st into the next 2 sts from the last row of the sleeve
Row 2: sc blo to the end, turn (4)
Row 3: ch1, sc blo to the end (4), sl st into the next 2 sts from the last row of the sleeve
Repeat Rows 2 to 3 until the last st of the sleeve. Fold in half and seam with a whip stitch.
Joining
Join the front panels to the back panel with a whip stitch across the shoulders. Join the sleeves with a whip stitch around the edge, it may help to pin in place first. Seam up the sides of the cardigan with the remaining space.
Front edging
Join yarn to the bottom corner of the left hand side panel. Work a row of sc evenly across the rows of the front panels/sts around the neck of the back panel. To keep the sts even and avoid any curling or stretching, I suggest following *sc in the 1st row, sc in the 2nd row, skip the 3rd row*, repeat.
At the end of the 1st round of sc, turn and sc in each st.
At the end of the 2nd round, turn and sc in each st, finishing with 3 rounds of sc edging. Finish!
Not ready to start your mushroom crochet cardigan yet? Save this post for later.
