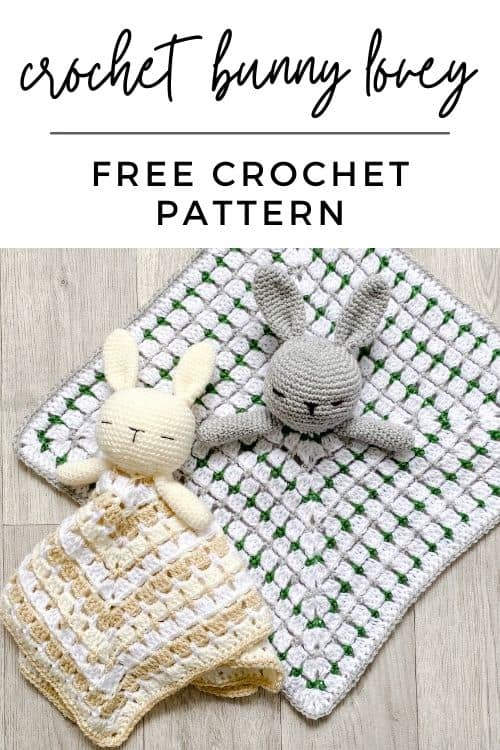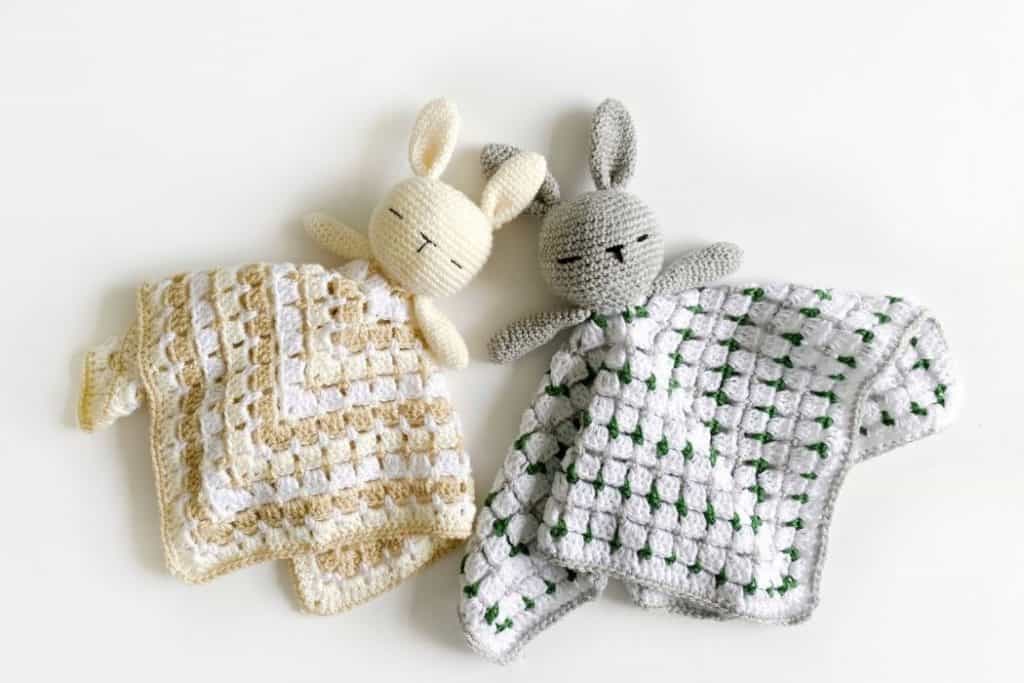
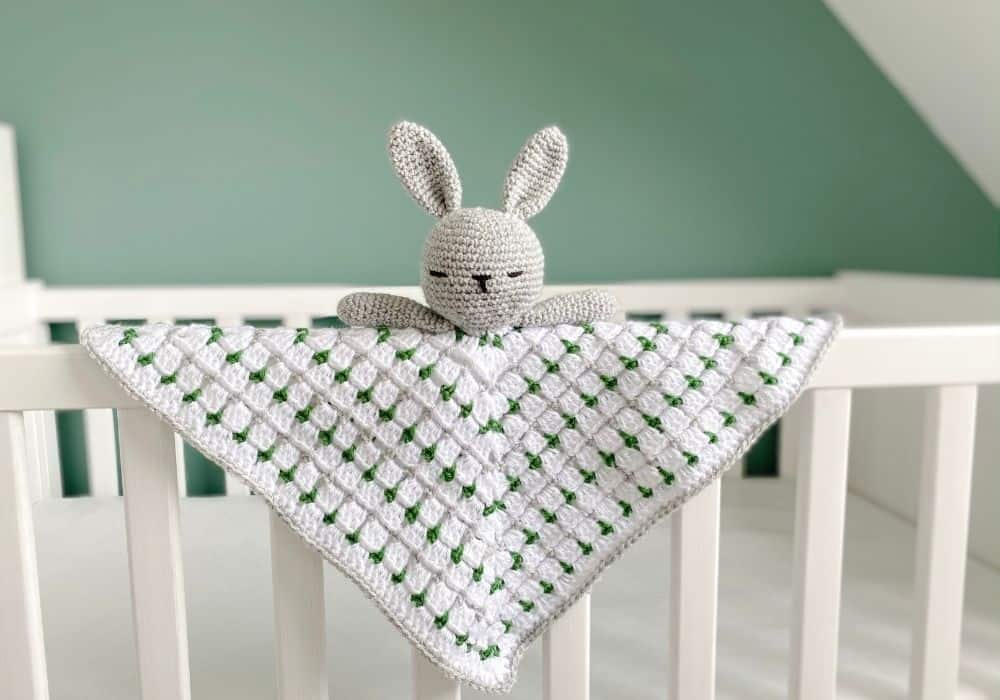
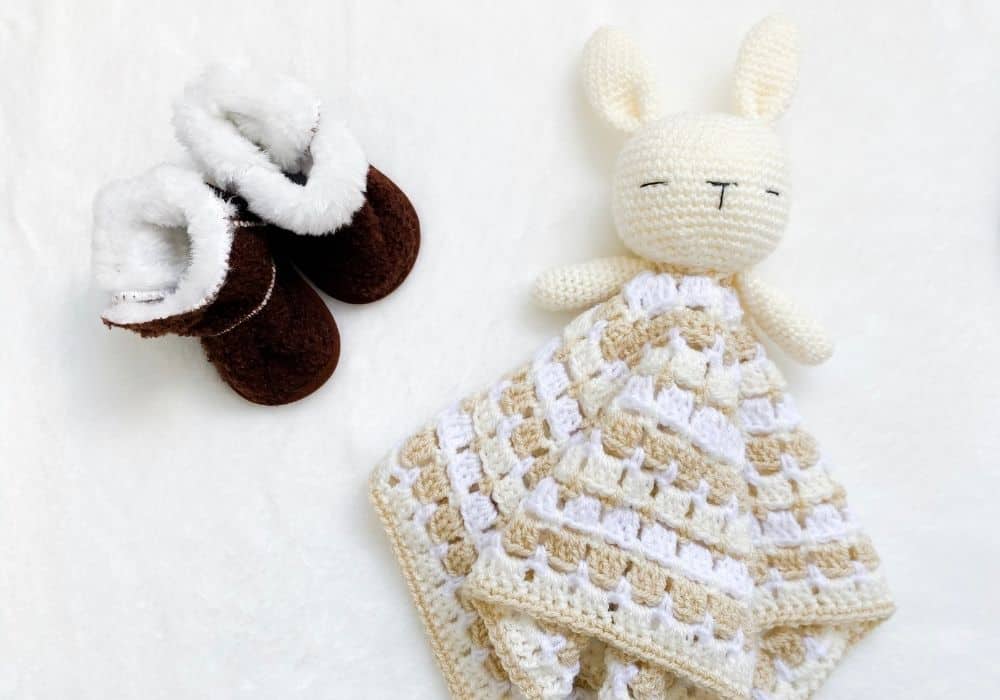
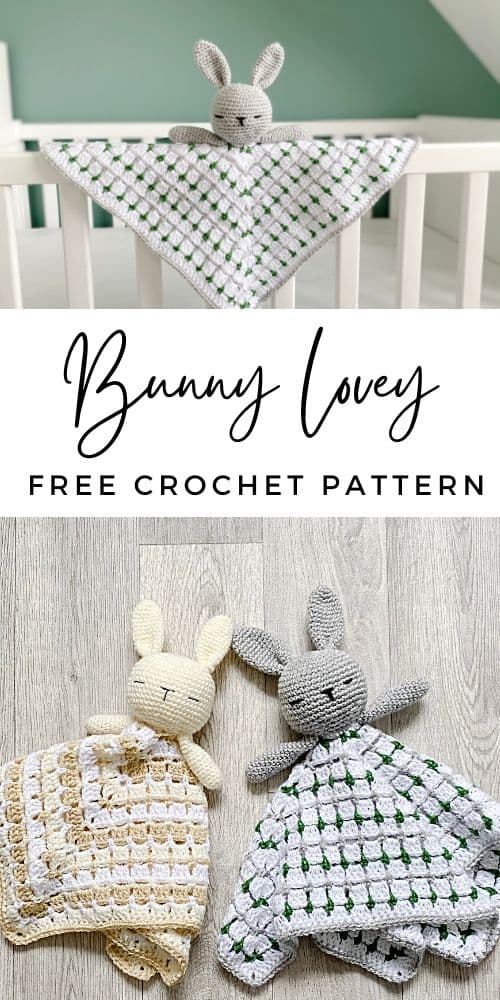
This free crochet bunny lovey pattern is my new favourite baby crochet make, perfect for baby boys or girls with so many colour options!
Keep your crochet comforter neutral in muted tones, or add colour for a bright and fun lovey blanket.
I’ve used a simple DK acrylic for my versions (mostly Paintbox), though a soft cotton would work just as well and may even hold up better in the long run.
The block stitch used in the blanket section is so therapeutic and looks amazing in so many colour combinations! Add smaller pops of colour by contrasting the sc and dc rows like the grey and green pictured above, or go for a more gradient style of colour change by including more different shades like the creams pictured below. This stitch pattern also looks great with one base colour separated by a rainbow palette in the sc rows.
This post contains affiliate links, meaning I may make a commission if you purchase through a link, at no additional cost to you.
More Free Crochet Patterns

You can find the ad-free downloadable PDF version of this pattern in your favourite pattern store below.


Crochet Bunny Lovey Pattern
What you need for the crochet bunny lovey pattern
- DK acrylic yarn (100g or 362 yards)
- A light yarn or thread for the facial features
- Stitch marker
- Filling for the head
- 3.5mm & 4.5mm hooks
- Scissors and needle for finishing
I used yarn from Paintbox Yarns Simply DK and Stylecraft Special DK in various shades.
Concentration Level
Overall, a pattern for experienced beginners +. Straightforward amigurumi construction and a repeatable blanket pattern after the first few rounds.
Stitches & Abbreviations
Stitches are in US terms.
Chain: ch
Slip Stitch: sl st
Stitch(es): st(s)
Skip: sk
Double Crochet: dc
Single Crochet: sc
Gauge
Finished blanket will be approx 15×15″
Notes
- Stitch counts will be in brackets at the end of each row
- The head, ears and arms are worked in continuous rounds with no sl sts or chs.
- The blanket is worked in square rows with a sl st at the end of each row
- Pattern is worked flat in rows, with a turn at the end of every row
- ‘2sc’ means work 2 sc in the same stitch
- ‘sc 2’ means work 1 sc in the next 2 sts
Free Crochet Bunny Lovey Pattern
Head
Using 3.5mm hook
Rnd 1: in a magic ring, ch1 and work 6 sc, pull ring closed (6) it may help to place a stitch marker in the 1st sc so you can identify the start of each round
Rnd 2: work 2 sc in each st (12) replace the stitch marker in the final stitch if using one
Rnd 3: *sc, 2sc* repeat * around (18)
Rnd 4: *sc 2, 2sc* repeat * around (24)
Rnd 5: *sc 3, 2sc* repeat * around (30)
Rnd 6: *sc 4, 2sc* repeat * around (36)
Rnd 7: *sc 5, 2sc* repeat * around (42)
Rnds 8 to 17: sc in each st (42)
Rnd 18: *sc 5, dec* repeat * around (36)
Rnd 19: *sc 4, dec* repeat * around (30)
Start filling. If you prefer to use safety eyes then add these now.
Rnd 20: *sc 3, dec* repeat * around (24)
Rnd 21: *sc 2, dec* repeat * around (18)
Rnd 22: *sc, dec* repeat * around (12)
Rnd 23: dec around (6)
Finish filling.
Sew Rnd 23 closed, leaving a long tail to later join to the blanket section.
Ears (x2)
Using 3.5mm hook
Rnd 1: in a magic ring, ch1 and work 6 sc, pull ring closed (6)
Rnd 2: *sc, 2sc* repeat * around (9)
Rnd 3: *sc 2, 2sc* repeat * around (12)
Rnd 4: *sc 3, 2sc* repeat * around (15)
Rnds 5 to 15: sc in each st (15)
Fasten off, leaving a long tail to join to the head. Repeat for the 2nd ear.
Arms (x2)
Using 3.5mm hook
Rnd 1: in a magic ring, ch1 and work 6 sc, pull ring closed (6)
Rnd 2: *sc, 2sc* repeat * around (9)
Rnd 3: *sc 2, 2sc* repeat * around (12)
Rnds 4 to 18: sc in each st (12)
Fasten off, leaving a long tail to join to the head. Repeat for the 2nd arm.
Blanket
Using 4.5mm hook
The blanket section is made in square rows with a sl st at the end of each row. This is written with the assumption that the colour will be changed in each row. To do that, fasten off at the end of each row and join yarn into the ch2 corner space to start that row.
Row 1: in a magic ring; ch3, 2dc, ch2, 3dc, ch2, 3dc, ch2, 3dc, ch2, sl st into the top of the first ch3
Row 2: ch1, ch3, *(sc, ch2, sc) in the ch2 corner sp from the previous row, ch3* repeat * 3x, (sc, ch2) in the last ch2 corner sp from the previous row, sl st into the first ch1
Row 3: (ch3, 2dc) in the ch2 sp, *3dc in the ch3 sp, (3dc, ch2, 3dc) in the ch2 corner sp* repeat * 3x, 3dc in the ch3 sp, (3dc, ch2) in the last ch2 corner sp, sl st into the top of the first ch3
Row 4: ch1, ch3 above each cluster of 3 dc, sc between each of the clusters of 3dc, (sc, ch2, sc) in each ch2 corner sp, In the last ch2 sp, (sc, ch2), sl st into the first ch1
Row 5: (ch3, 2dc) in the ch2 sp, *3dc in each ch3 sp, (3dc, ch2, 3dc) in each ch2 corner sp* repeat * repeat * around, (3dc, ch2) in the last ch2 corner sp, sl st into the top of the first ch3
Repeat Rows 4 and 5 for a total of 19 rows.
Row 20: ch1, sc in each dc around, sl st and fasten off.
Seaming
Pinch base of ears together and secure with a few stitches, join to head at around 5 rows down from the centre, in the middle of the head. Repeat with other ear.
Join the head to the blanket. Suggest attaching through the centre of each and then around in line with rows 1-2 of the blanket.
Fill the arms (around half way or whatever your preference is) and join in line with the head and the blanket seam.
Face
If safety eyes have already been added, add a nose/mouth however you prefer.
To follow the face pictured below, you’ll need your lightweight yarn or thread and a needle.
Starting with the nose & mouth, join the yarn in the center of the face approx half way down.
- Make a vertical line the height of 3 rows.
- Working back up to the top the line, extend horizontally to form a T shape approx 3 sts wide
- Using the nose/mouth as a guide, count across 3 sts and form a horizontal eye line for another 3 sts. Repeat on the other side of the nose.
Love this bunny lovey crochet pattern but not quite ready? Pin for later or save to your pattern favourites from the pattern stores below.